Santa Snack Board: An Amazing Ultimate Guide with 7 Delicious Ideas
Santa Snack Board is a creative way to celebrate the holiday season with family and friends. This festive spread is not just a treat for the taste buds but also a delightful visual feast that brings everyone together. Imagine a table adorned with various colorful snacks, sweet treats, and seasonal delights, turning snack time into an event to look forward to. Whether for a holiday gathering, a kids’ party, or just to kick off the festive spirit, a Santa Snack Board offers the perfect opportunity to unleash your creativity in the kitchen.
Creating a Santa Snack Board can be a joyful experience, particularly when you involve your loved ones in designing it. This approach encourages collaboration and imagination, making it an interactive activity that fosters bonding. Each person can select their favorite snacks, ensuring that everyone gets to enjoy something special. The versatility of a Santa Snack Board allows you to incorporate various flavors and textures, making it suitable for both sweet and savory enthusiasts alike.
As you gather around the table filled with vibrant colors and delectable scents, you’ll understand why a Santa Snack Board is not just food, but a celebration of love, sharing, and joy. This guide will dive into the specifics of making an incredible Santa Snack Board, complete with delightful recipe ideas and tips for serving. Get ready to impress your holiday guests with a spread that radiates warmth and festive cheer!
Why You’ll Love This Recipe
The appeal of a Santa Snack Board lies not just in its visual allure but also in its endless possibilities. Here are some reasons why you’ll fall in love with this recipe:
1. Customization: You can include snacks that cater to all preferences, from savory cheeses to sweet holiday treats.
2. Fun for All Ages: Kids and adults alike can enjoy the creativity involved in building their own snack combinations.
3. Easy Preparation: Unlike traditional recipes that require time-consuming cooking, a Santa Snack Board is primarily about arranging snacks.
4. Minimal Cooking Required: With simple, no-cook options, you can save time and effort for other holiday preparations.
5. Visually Stunning: The vibrant display of colors and textures makes it a centerpiece on any holiday table.
6. Great for Sharing: Everyone can pick and choose what they like, making it easy to accommodate dietary restrictions or preferences.
7. Perfect for Leftovers: It’s a fantastic way to use up leftover snacks, making it both practical and festive.
By considering these elements, you can see why creating a Santa Snack Board is not only a delightful culinary adventure but also a wonderful way to spread holiday cheer among your loved ones.
Preparation and Cooking Time
Preparing a Santa Snack Board is straightforward and quick, ensuring you can spend more time enjoying the festive season. Here’s a breakdown of the time required:
– Preparation Time: 30 minutes (this includes shopping for ingredients and arranging them on the board)
– Serving Time: Ready to serve immediately after assembling!
These times may vary depending on the scale of your board and how involved you want to get with decorations. However, this framework provides an excellent guideline for planning your festive creation.
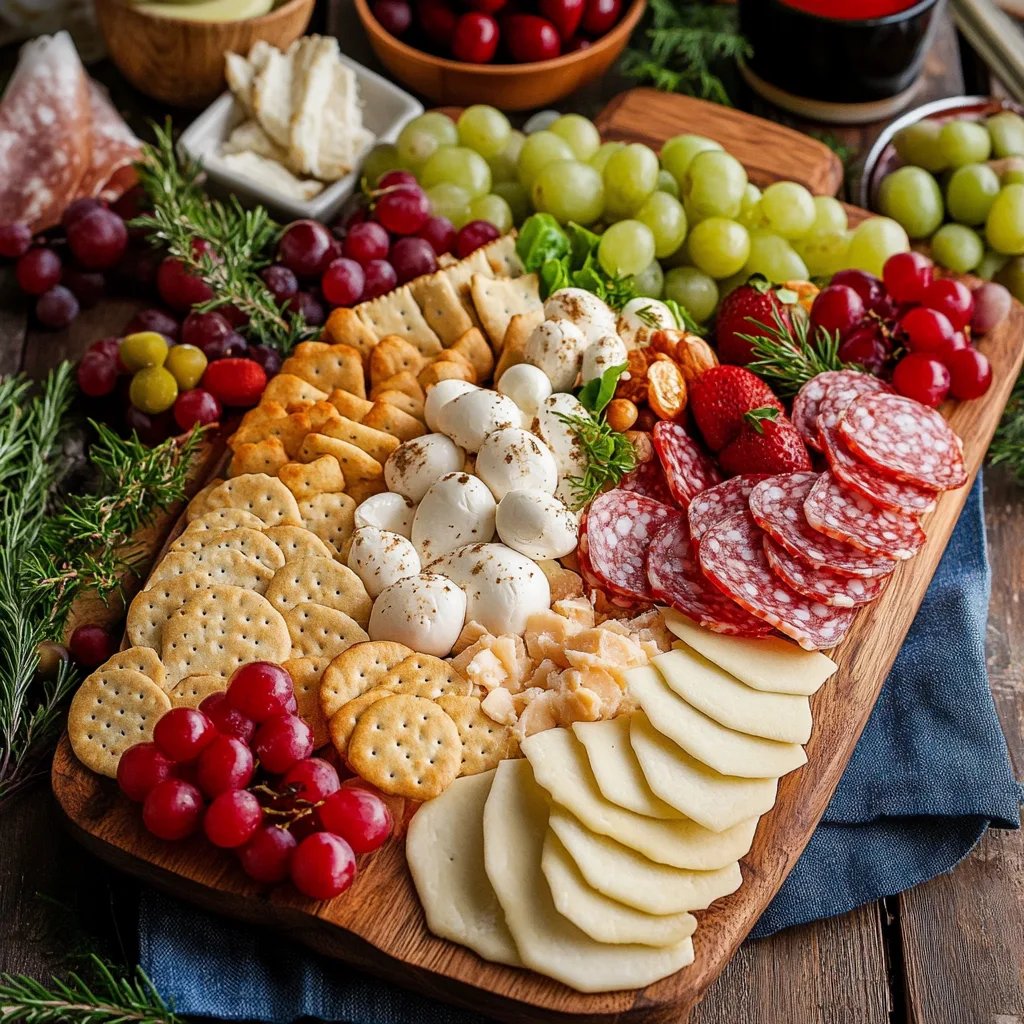
Ingredients
– A variety of cheeses (cheddar, brie, gouda)
– Assorted cured meats (salami, prosciutto, pepperoni)
– Fresh fruits (grapes, apple slices, berries)
– Nuts (almonds, walnuts, pecans)
– Mini pretzels or crackers
– Chocolate candies (peppermint bark, chocolate-covered pretzels)
– Holiday cookies (gingerbread cookies, sugar cookies)
– Vegetables (carrot sticks, cherry tomatoes, cucumber slices)
– Dips (hummus, ranch dressing, cheese spread)
Step-by-Step Instructions
Creating your Santa Snack Board is simple if you follow these straightforward steps:
1. Choose Your Board: Select a large, flat surface like a wooden cutting board, slate platter, or even a festive tray.
2. Assign Spaces: Begin by placing larger items like cheese blocks and bowls of dips around the board to create a balanced look.
3. Arrange Cheeses: Cut cheeses into various shapes (slices, cubes, or wedges) and place them strategically on the board.
4. Add Meats: Fold slices of cured meats and arrange them next to the cheeses, allowing for easy access.
5. Incorporate Fresh Fruits: Fill in spaces with clusters of grapes, apple slices, or berries for a refreshing touch.
6. Nestle in Nuts: Scatter nuts around the board to add small bites that complement the larger items.
7. Include Crunchy Snacks: Place mini pretzels or an assortment of crackers in separate sections for additional crunch.
8. Sweet Treats: Add bowls or small piles of chocolate candies and holiday cookies to tempt those with a sweet tooth.
9. Add Vegetables: Arrange colorful carrot sticks, cucumber slices, and cherry tomatoes to provide a healthy option.
10. Finish with Dips: Complete the board by placing dips in small bowls and positioning them among the other ingredients.
Enjoy arranging your Santa Snack Board, and don’t forget to step back and admire your handiwork!
How to Serve
When it comes to serving your Santa Snack Board, consider these tips to enhance the experience for your guests:
1. Presentation: Keep a festive theme in mind. You can use holiday-themed napkins, small ornaments, or even place cards to identify different snacks.
2. Serving Utensils: Provide small forks, toothpicks, or cheese knives for easy serving and to avoid cross-contamination of flavors.
3. Pairing Suggestions: Offer some beverage options like sparkling cider, eggnog, or mulled wine to accompany the board beautifully.
4. Encourage Experimentation: Let your guests know they can mix and match items, creating unique combinations.
5. Leftovers Storage: After the gathering, store any leftovers in airtight containers to maintain freshness.
With these tips, your Santa Snack Board will not only look incredible but also provide a delightful sharing experience that all guests will cherish during the festive season.
Additional Tips
– Use Seasonal Ingredients: Incorporate fresh, seasonal fruits and vegetables for the best flavor and presentation. Items like pomegranate seeds or persimmons can add a festive touch.
– Create a Theme: Consider a theme for your Santa Snack Board, such as a specific color scheme or a favorite holiday character. This makes it visually cohesive and fun.
– Experiment with Shapes: Use cookie cutters to create fun shapes out of cheeses and fruits. Star or heart shapes can enhance the festive look.
– Label Your Snacks: Adding small labels can help guests identify ingredients, especially if there are dietary restrictions. This makes it easier for everyone to enjoy the treats.
Recipe Variation
Feel free to add your personal touch! Here are a few variations to consider:
1. Sweet and Savory Mix: Consider adding different jams or spreads to complement your cheese selection. Fig jam pairs beautifully with brie.
2. International Flavors: Incorporate international snacks like hummus, pita chips, or Tabasco-covered nuts for a global twist.
3. Theme-based Boards: Create a board based on a theme like “Winter Wonderland” using white chocolate, coconut flakes, and light blue candies.
Freezing and Storage
– Storage: Keep your leftover snacks in airtight containers in the fridge. Most items will stay fresh for up to 3 days.
– Freezing: If you have excess cheese or meats, you can freeze them for up to 3 months. Wrap them tightly to avoid freezer burn. However, freezing fruits and vegetables can change their texture, so it’s best to consume these fresh.
Special Equipment
Creating a Santa Snack Board is simple, requiring minimal equipment, such as:
– A large cutting board or platter to serve as the base.
– Knives for cutting cheese and preparing fruits.
– Small bowls for dips and spreads.
– Serving utensils like spoons and toothpicks for easy access.
– Festive decorations such as napkins or ornaments, if desired.
Frequently Asked Questions
What is a Santa Snack Board?
A Santa Snack Board is a themed snack display that includes a variety of holiday treats, cheeses, meats, fruits, and baked goods designed to celebrate the festive season.
How do I keep food fresh on the board during a gathering?
Consider placing items that can spoil, like fresh fruits or dips, in the fridge until serving. You can also use ice packs underneath the board to help maintain a cool temperature.
Can I make a Santa Snack Board ahead of time?
Yes, you can prepare most items ahead of time. Just assemble the board a few hours before serving to keep everything looking fresh.
What if guests have allergies?
Always ask in advance about any food allergies and provide labels on the board to indicate what each item is, ensuring safe consumption for everyone.
Can vegetarian or vegan options be included?
Absolutely! You can include a variety of vegetables, hummus, nut cheeses, and plant-based snacks for vegetarian and vegan guests.
Conclusion
A Santa Snack Board is not just a fun way to enjoy snacks; it’s a way to bring people together during the holiday season. With a colorful array of ingredients, everyone can find something they love. Embrace creativity, enjoy the vibrant flavors, and cherish the moments spent around your beautifully arranged board. This delightful spread will surely enhance your festive gatherings, leaving lasting memories for you and your guests.